Arcade Mahjong
This page aims to collect information about how to play Mahjong arcade games on their original circuit boards, using either a arcade cabinet or a modern system.
Mahjong arcade games were quite popular in Japan from the 80's to the early 00's, and use a separate pinout and controls from Jamma arcade games. This implies that they are usually not plug & play with regular arcade cabinets without using adapters and a separate panel.
Some games are exceptions to this, and can be played in regular Jamma cabinets with stick and buttons. This is covered separately in the "Jamma compatible games" section.
What are Mahjong arcade games?
Mahjong arcade games are arcade games where you play Japanese Riichi mahjong against a AI opponent, or in some cases a second human player (on a separate cabinet). Explaining the rules of Riichi mahjong is mostly out of scope for this page, but some good resources for learning are:
- Mahjong in Mame
- A beginners guide to riichi Mahjong
- Play a lot of MahjongSoul on iOS/Android/PC
Arcade Mahjong games will often extend regular mahjong with special "cheat items", which unlocks benefits against the AI opponent. There's sometimes additional mini-games or gameplay elements added in there as well.
What make an "arcade" mahjong game is simply it being produced for use in Japanese game centers. This implies them either being on a stand-alone circuit board (PCB) for use in a cabinet, or as a game to be used in an arcade multi-game system (some examples: Neo Geo MVS, Kaneko Nova, Jaleco Mega System 32).
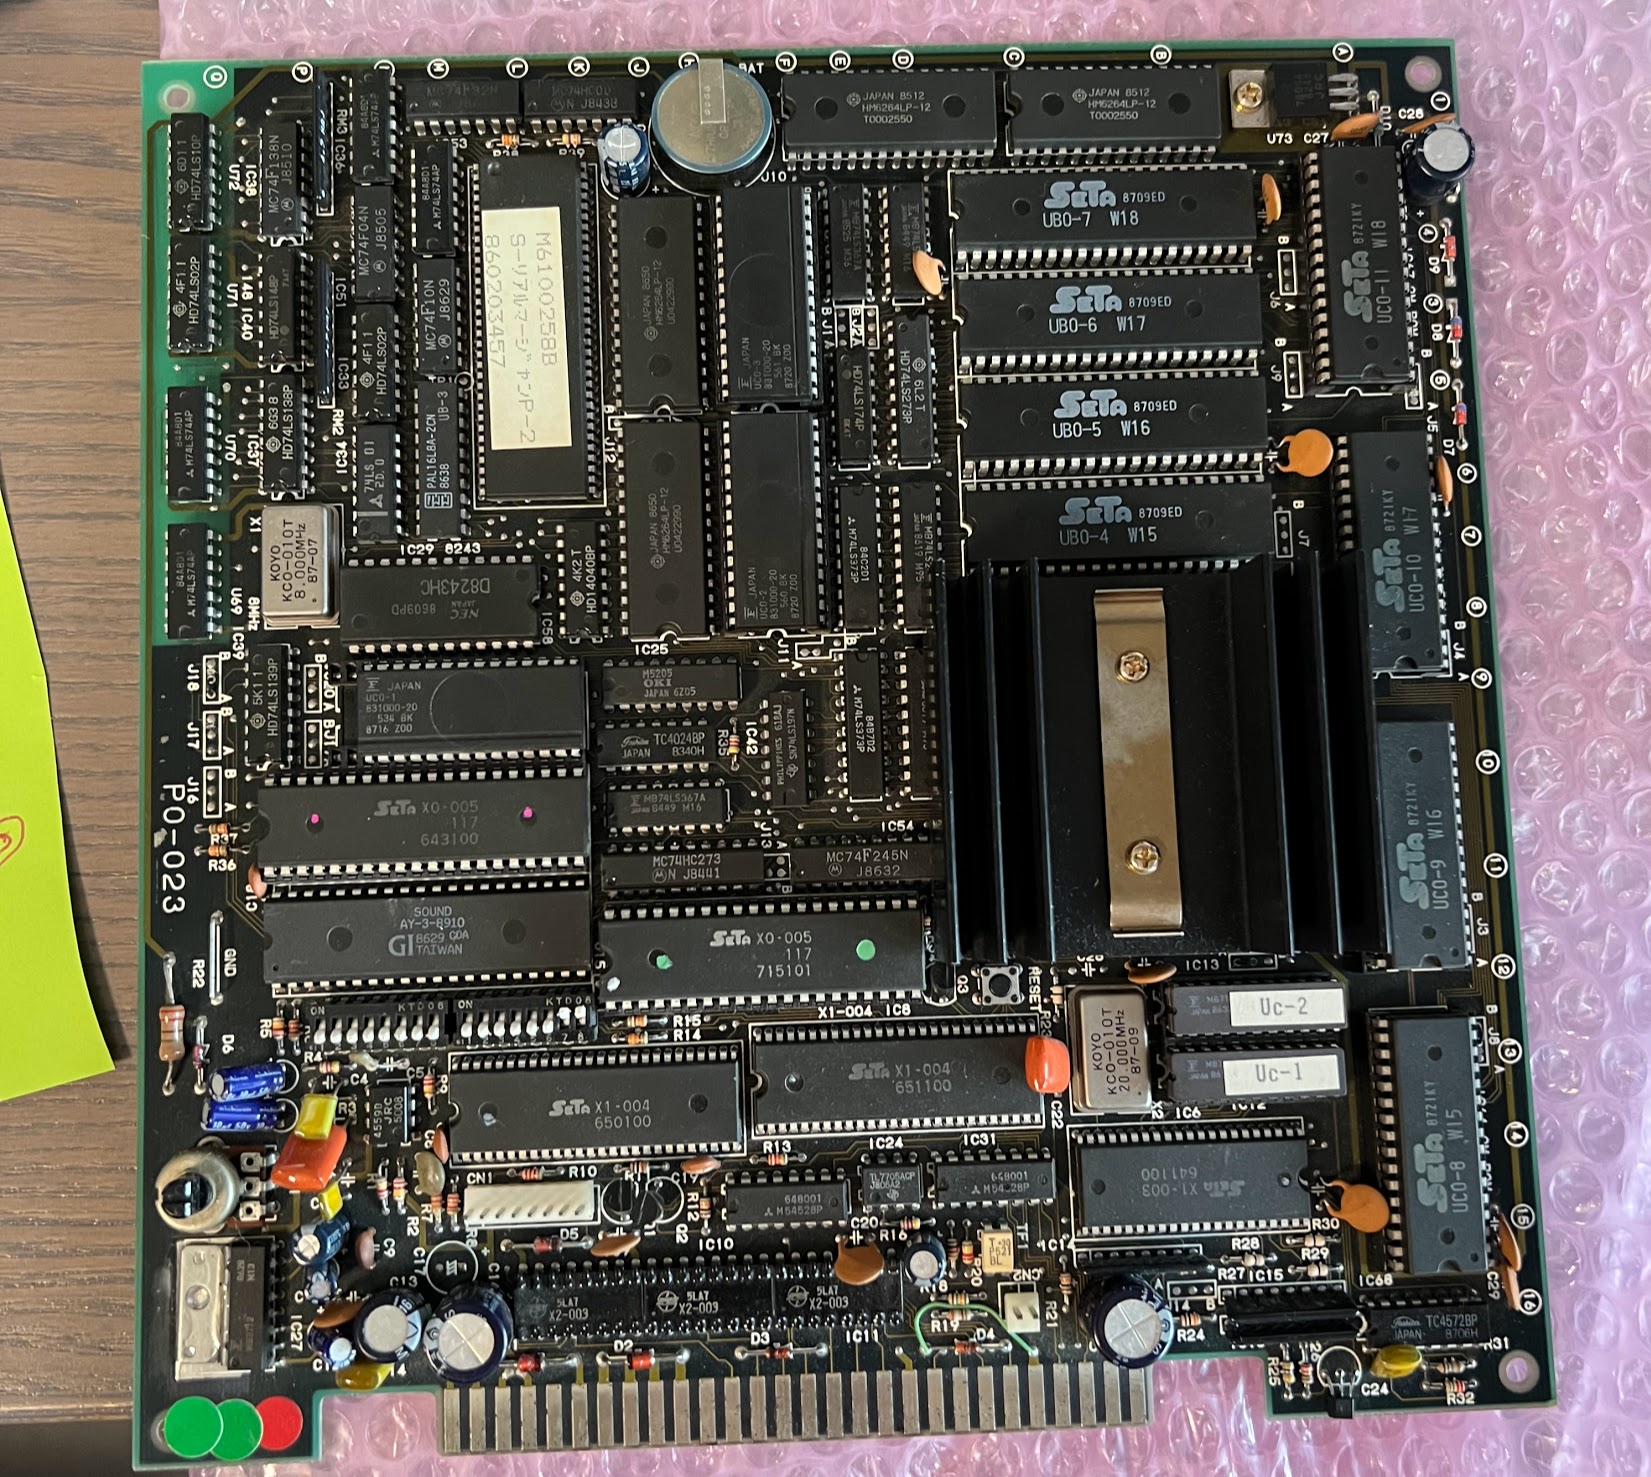
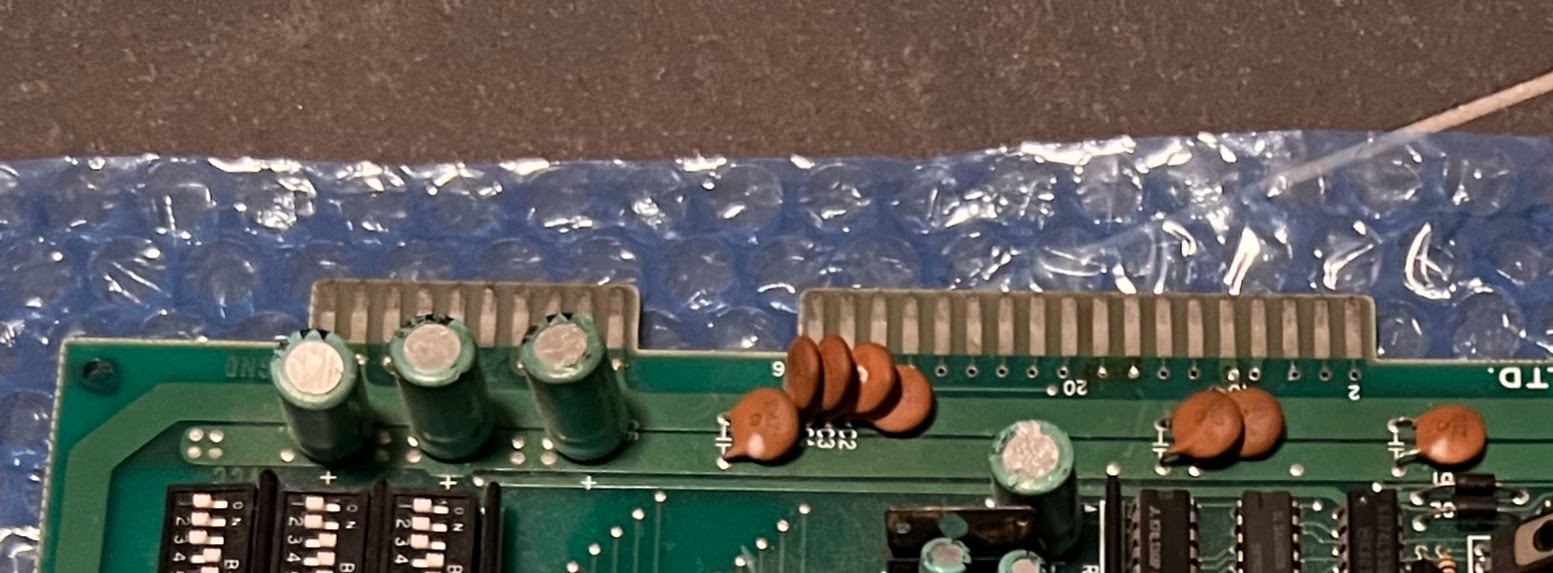
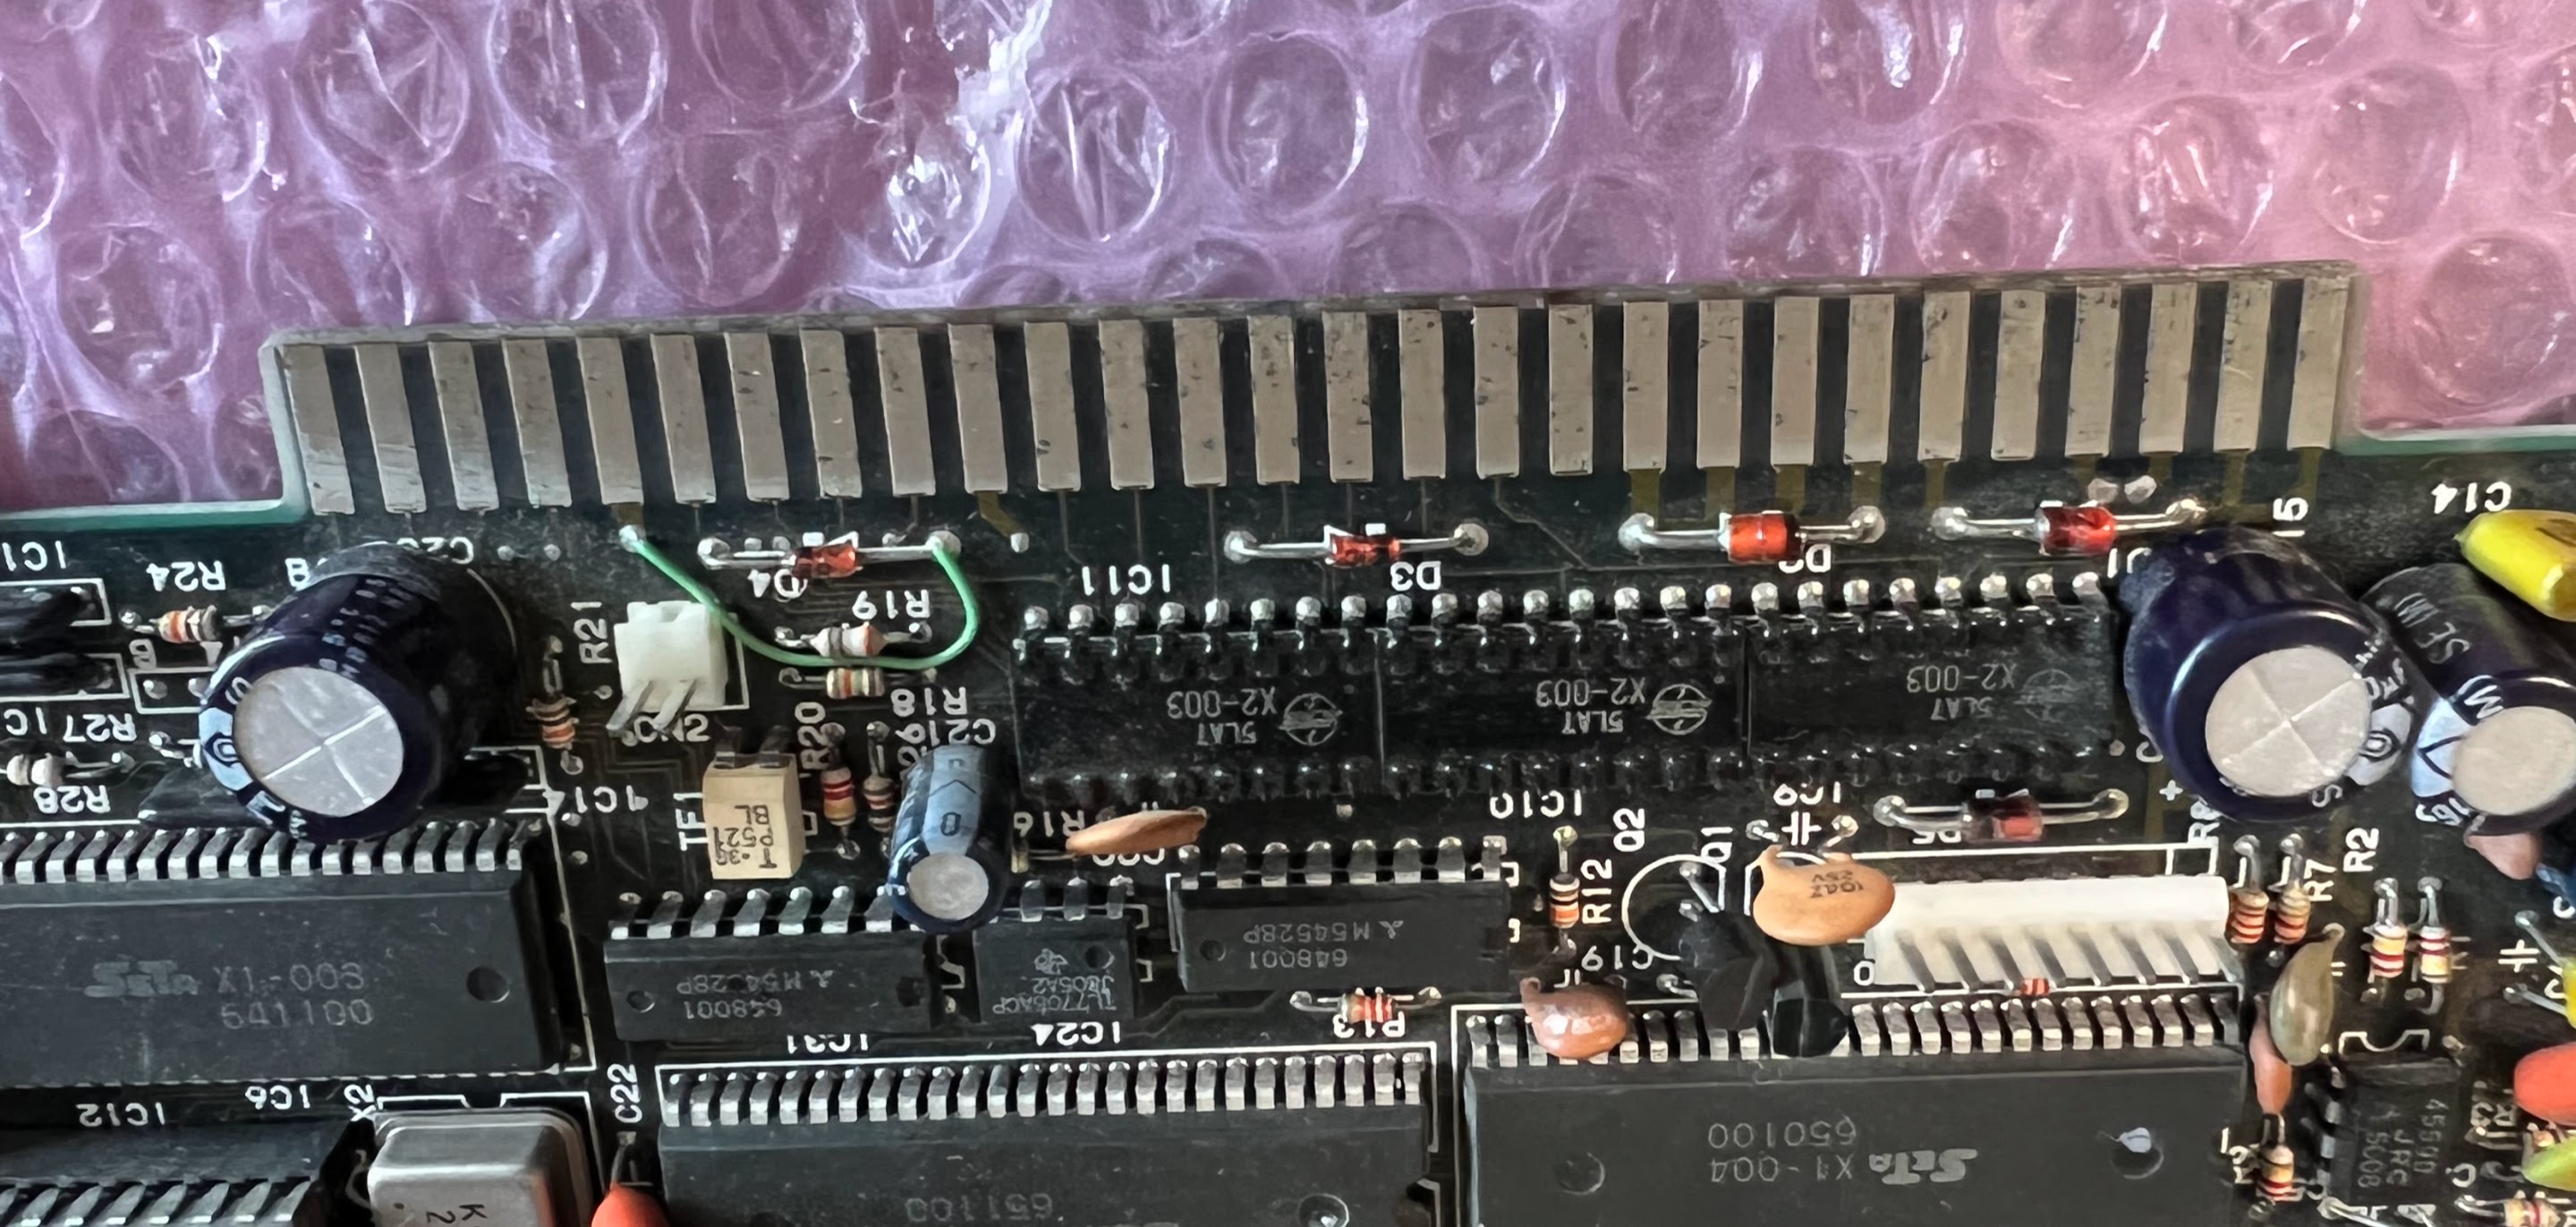
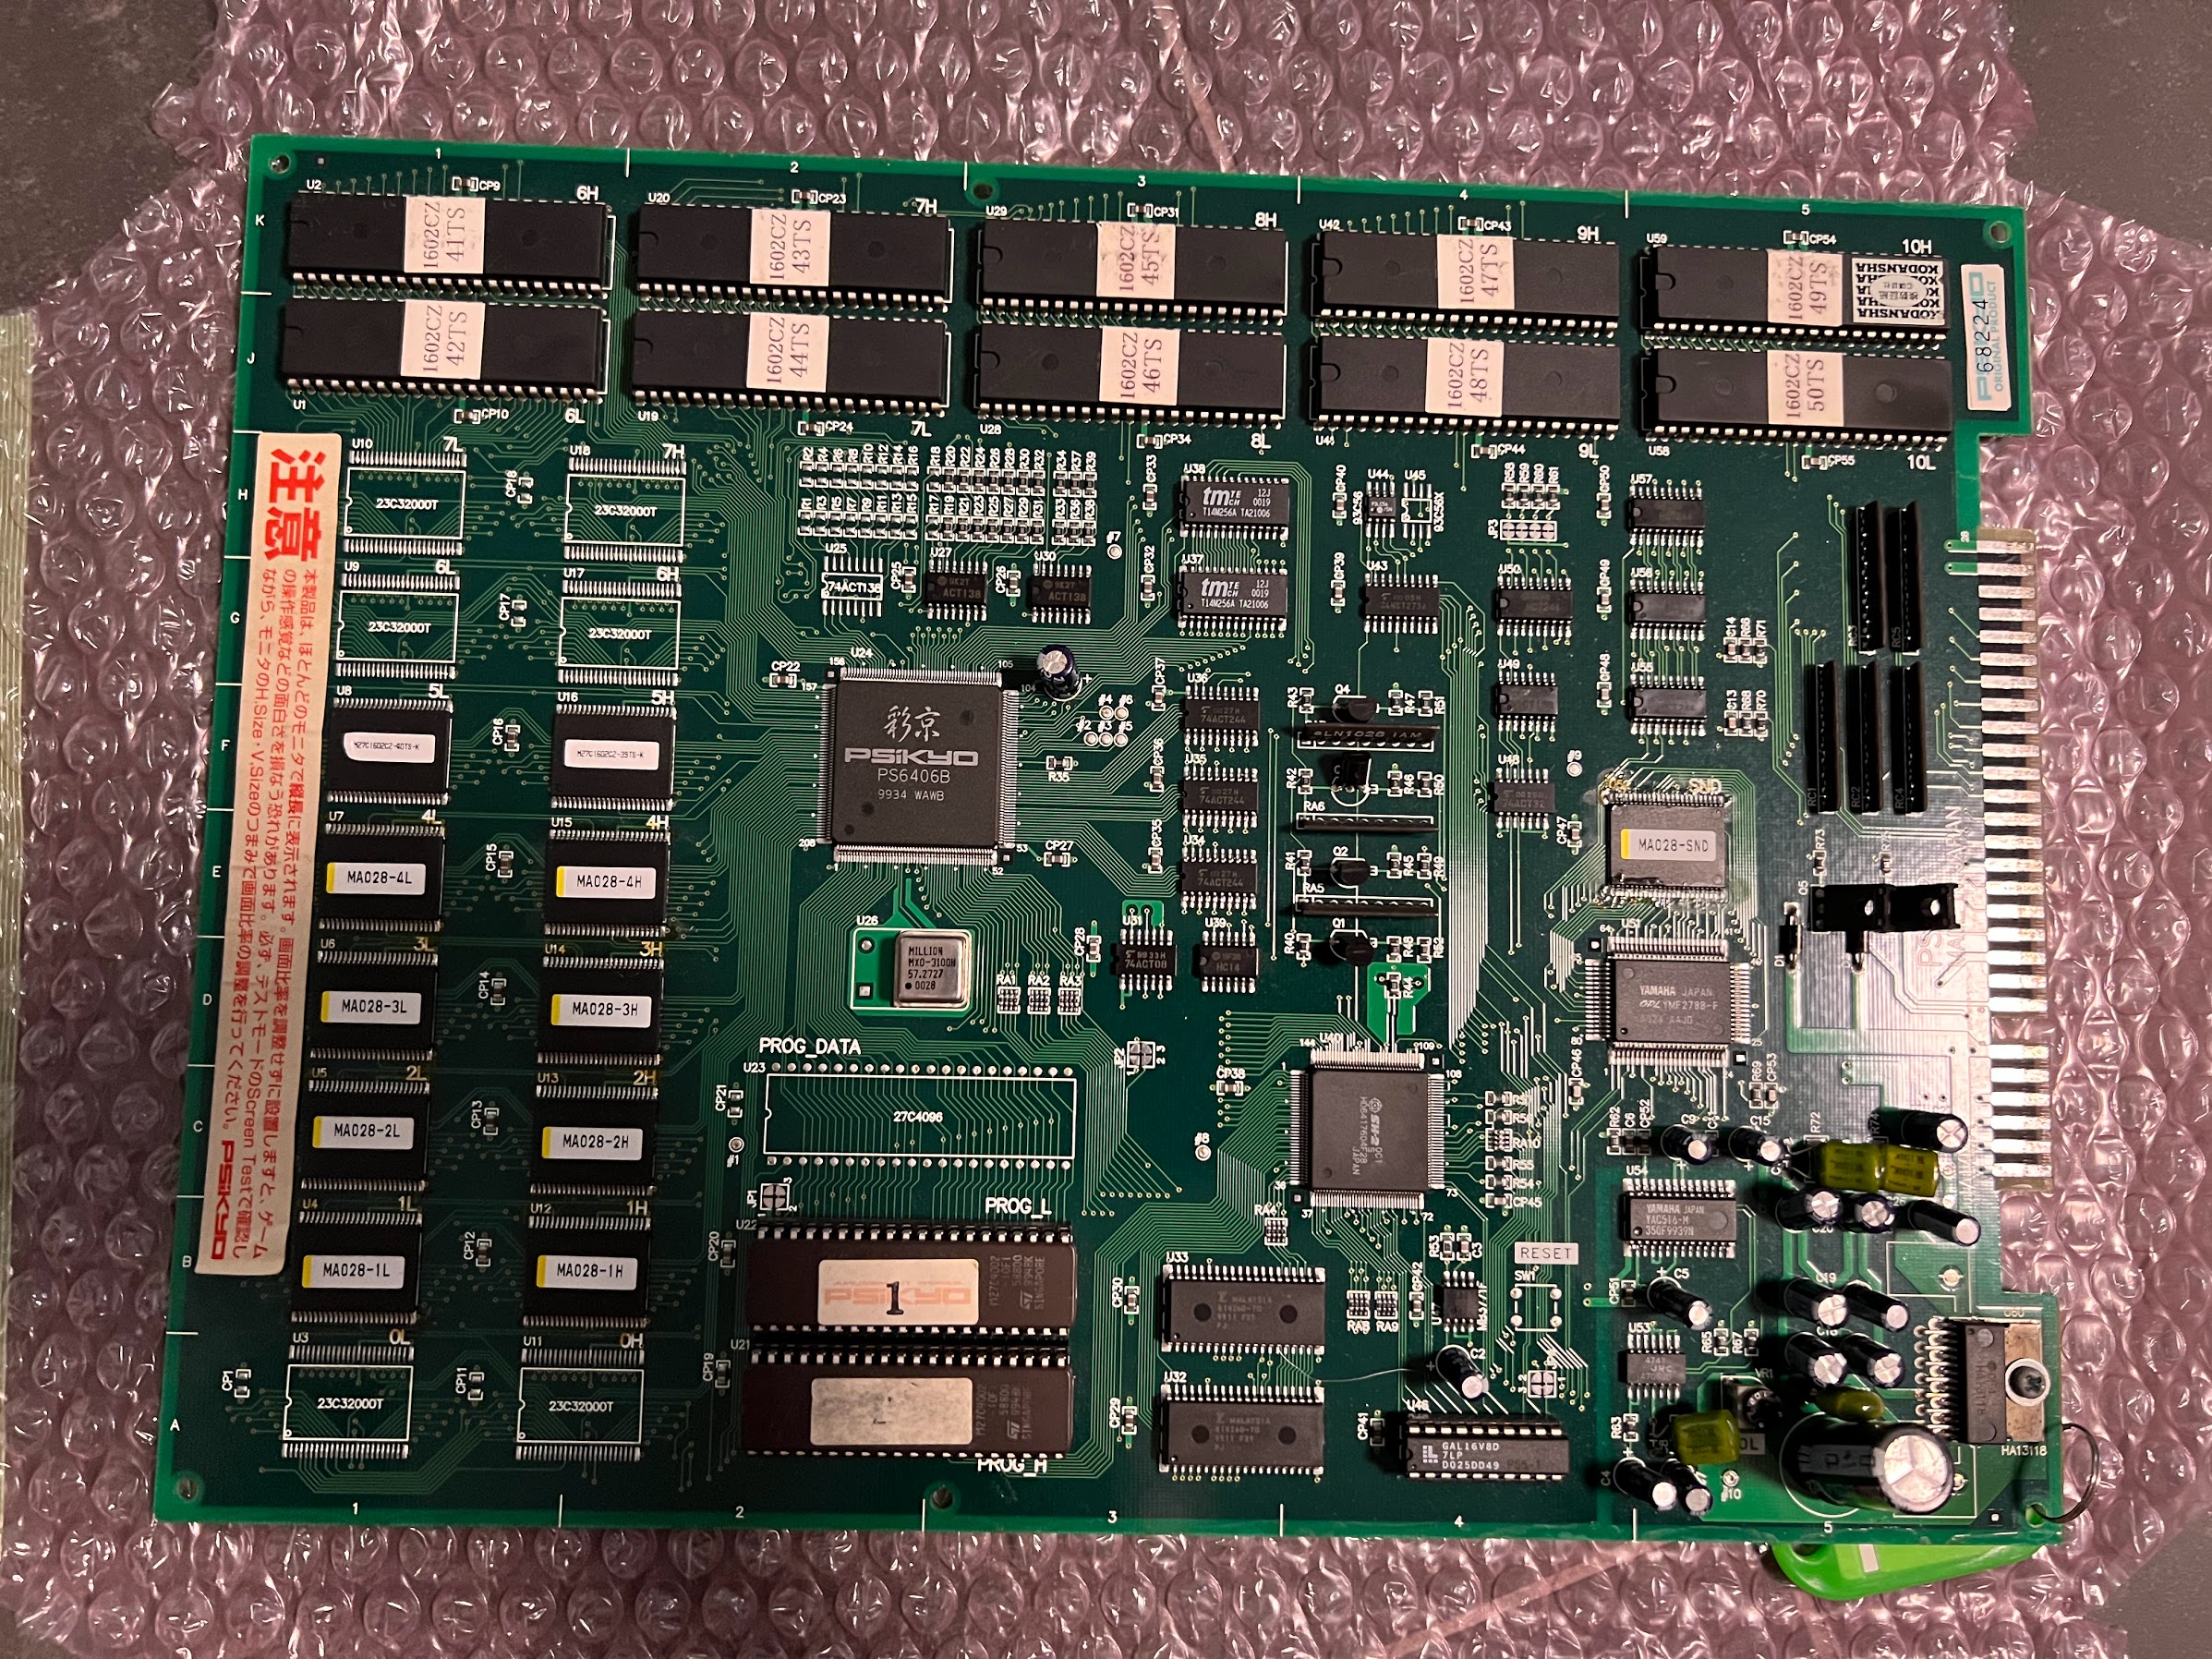
Here is a example of a stand-alone Mahjong PCB:
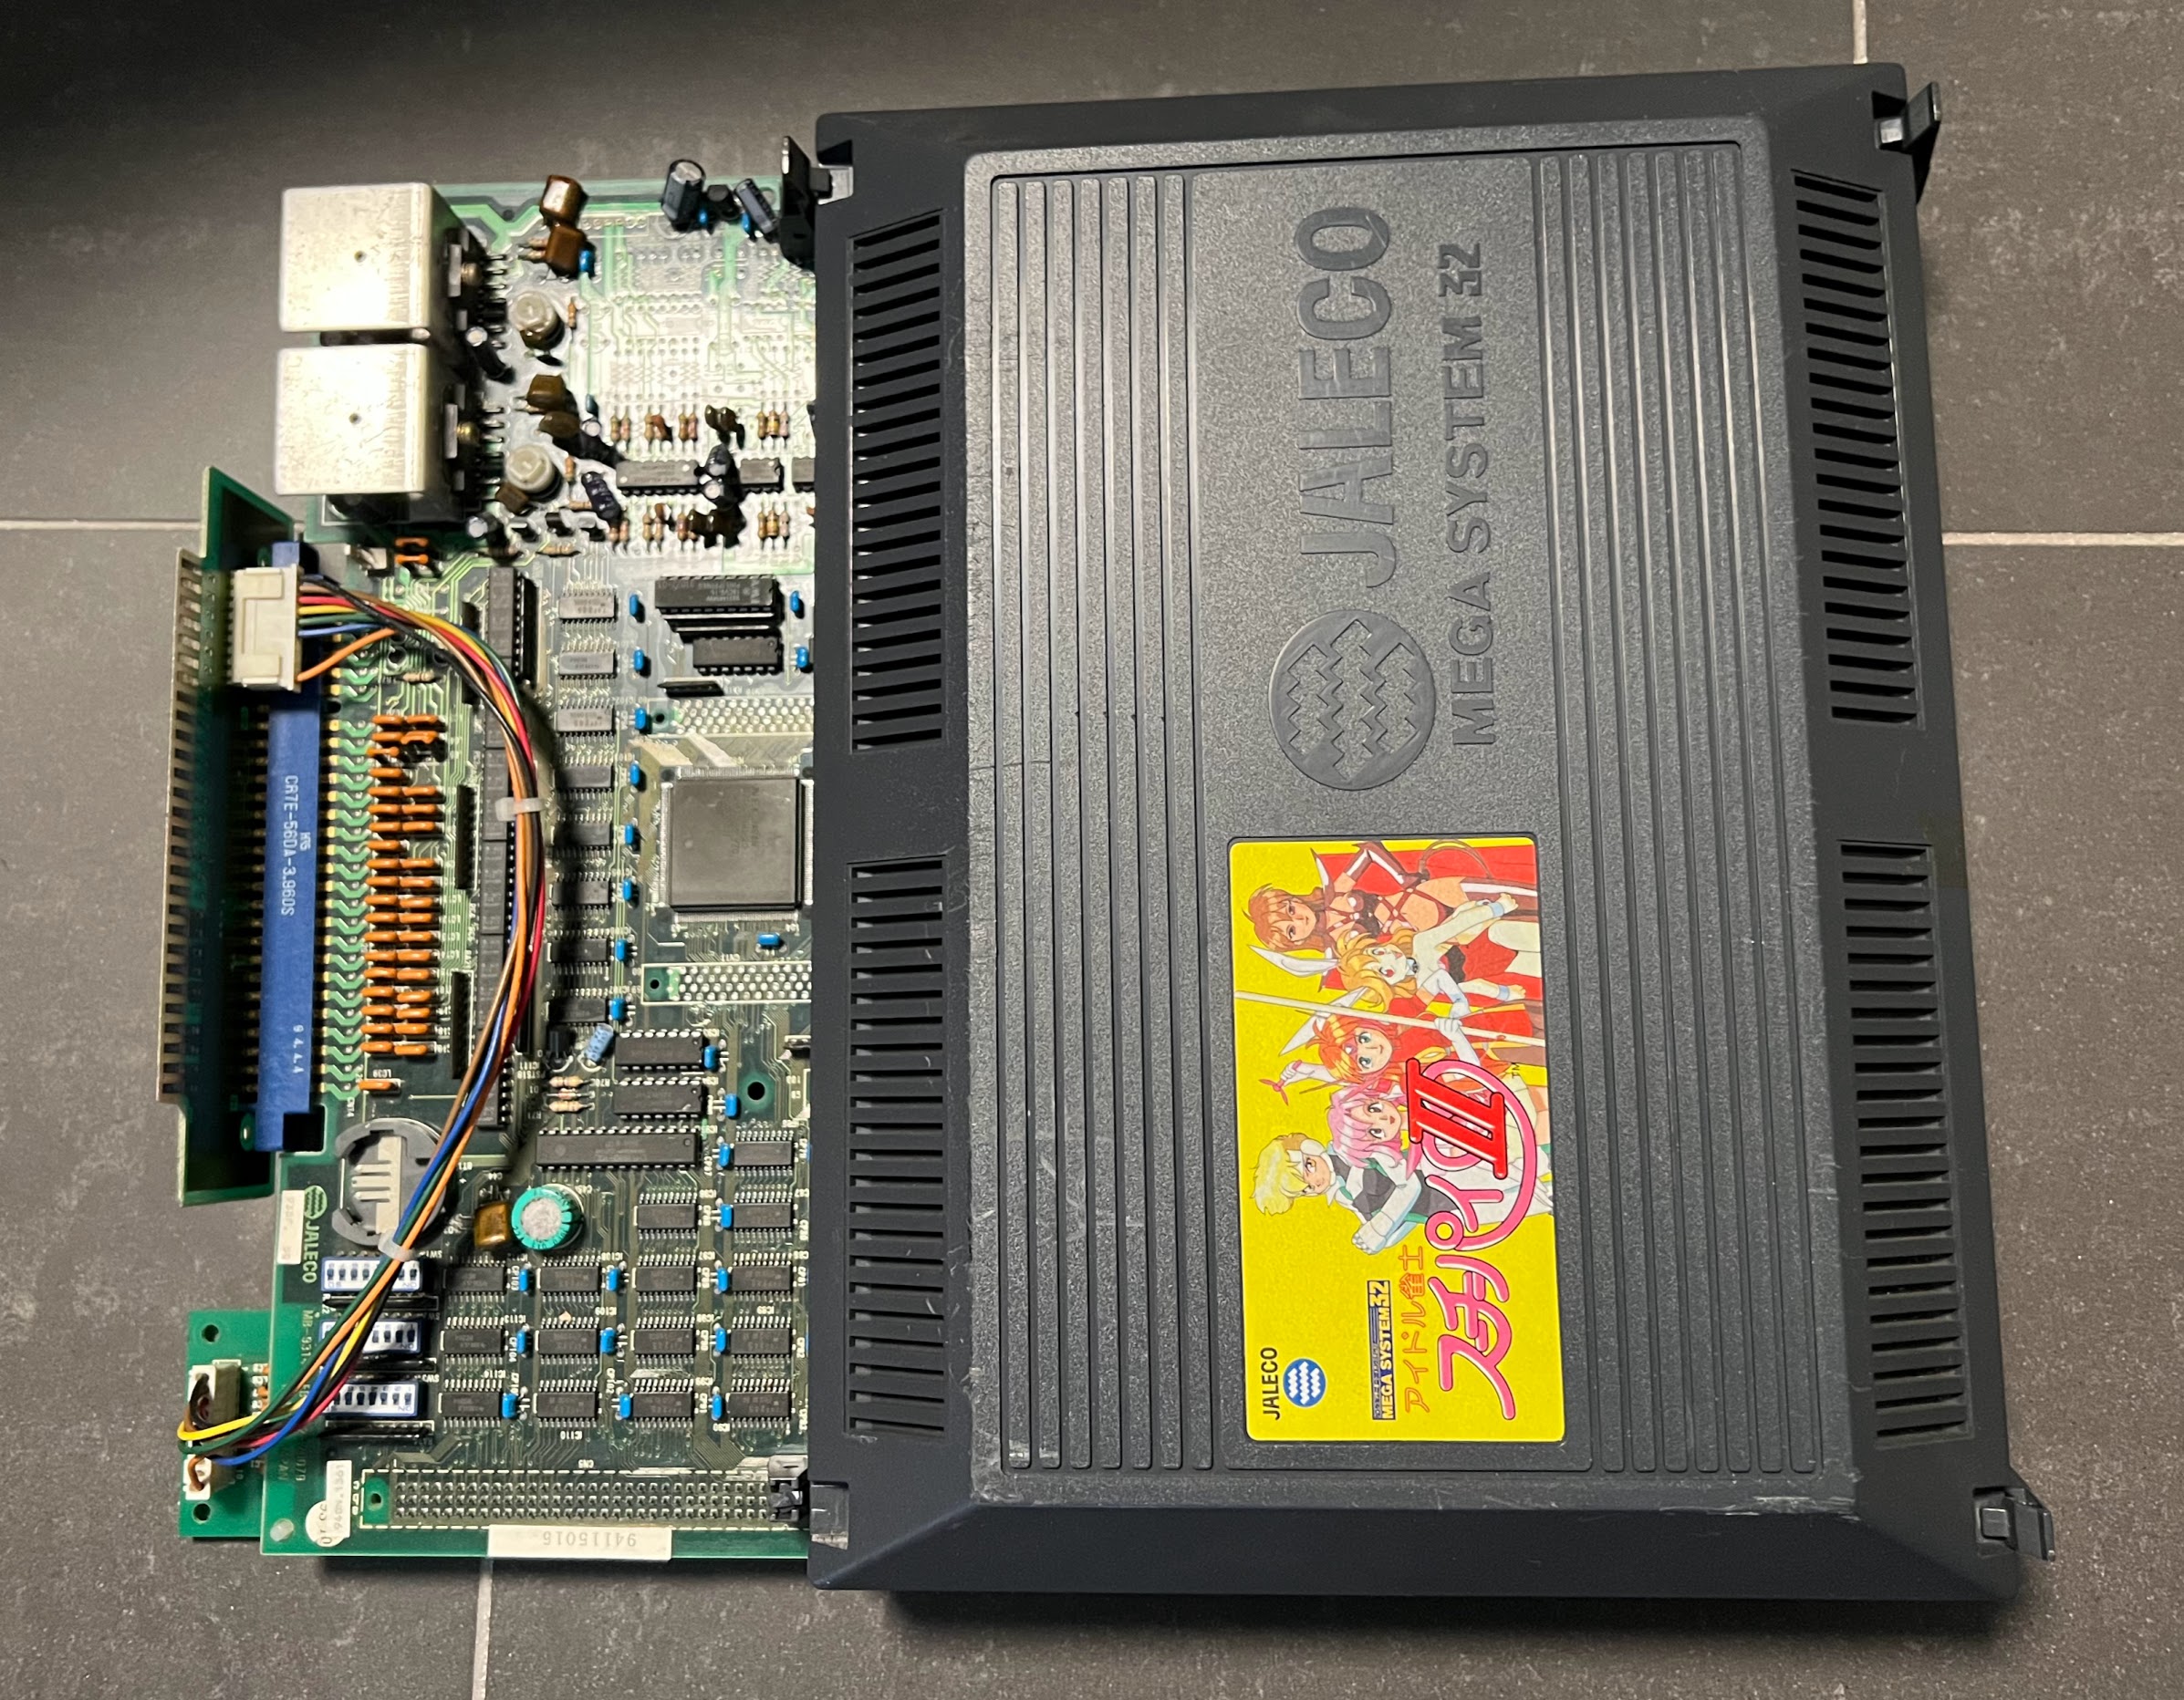
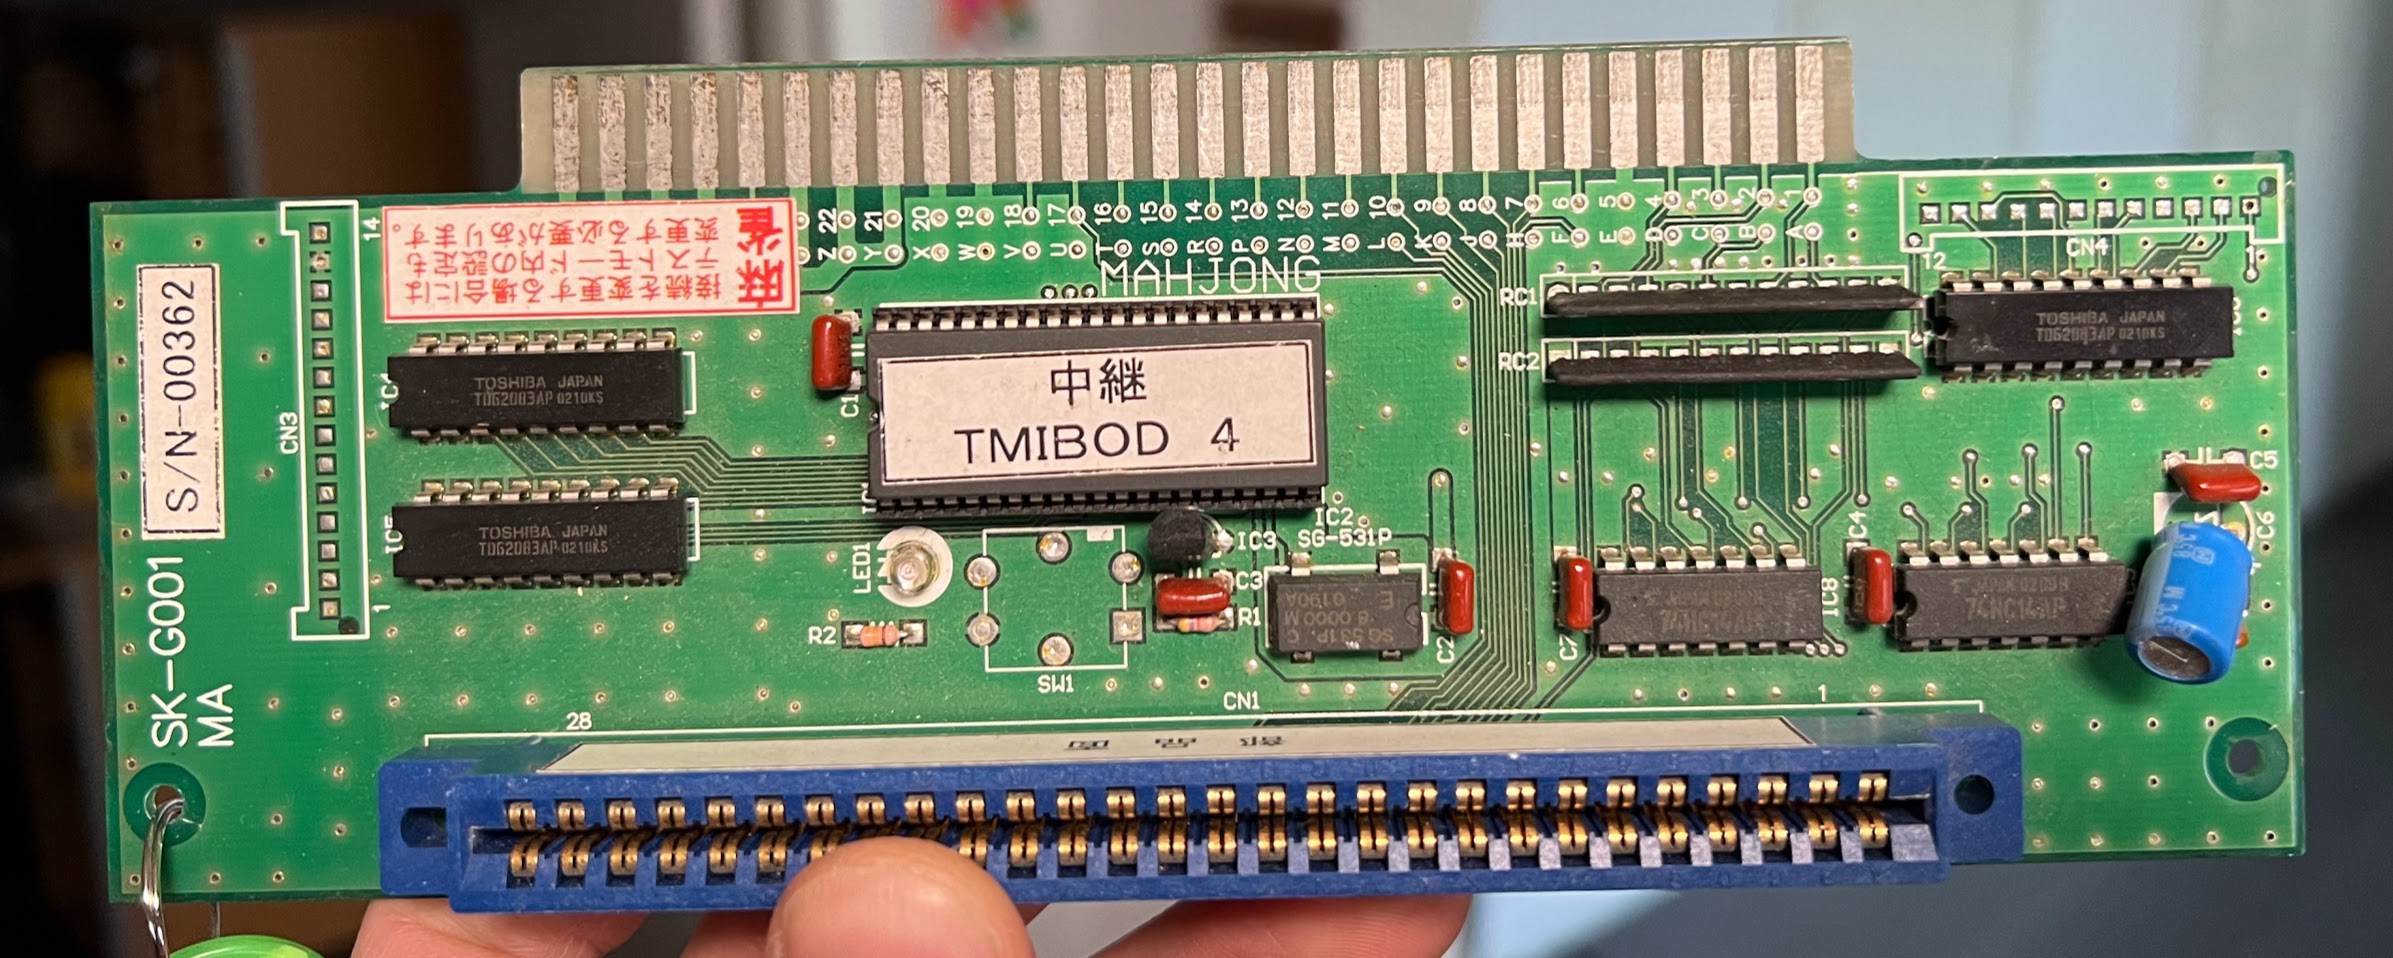
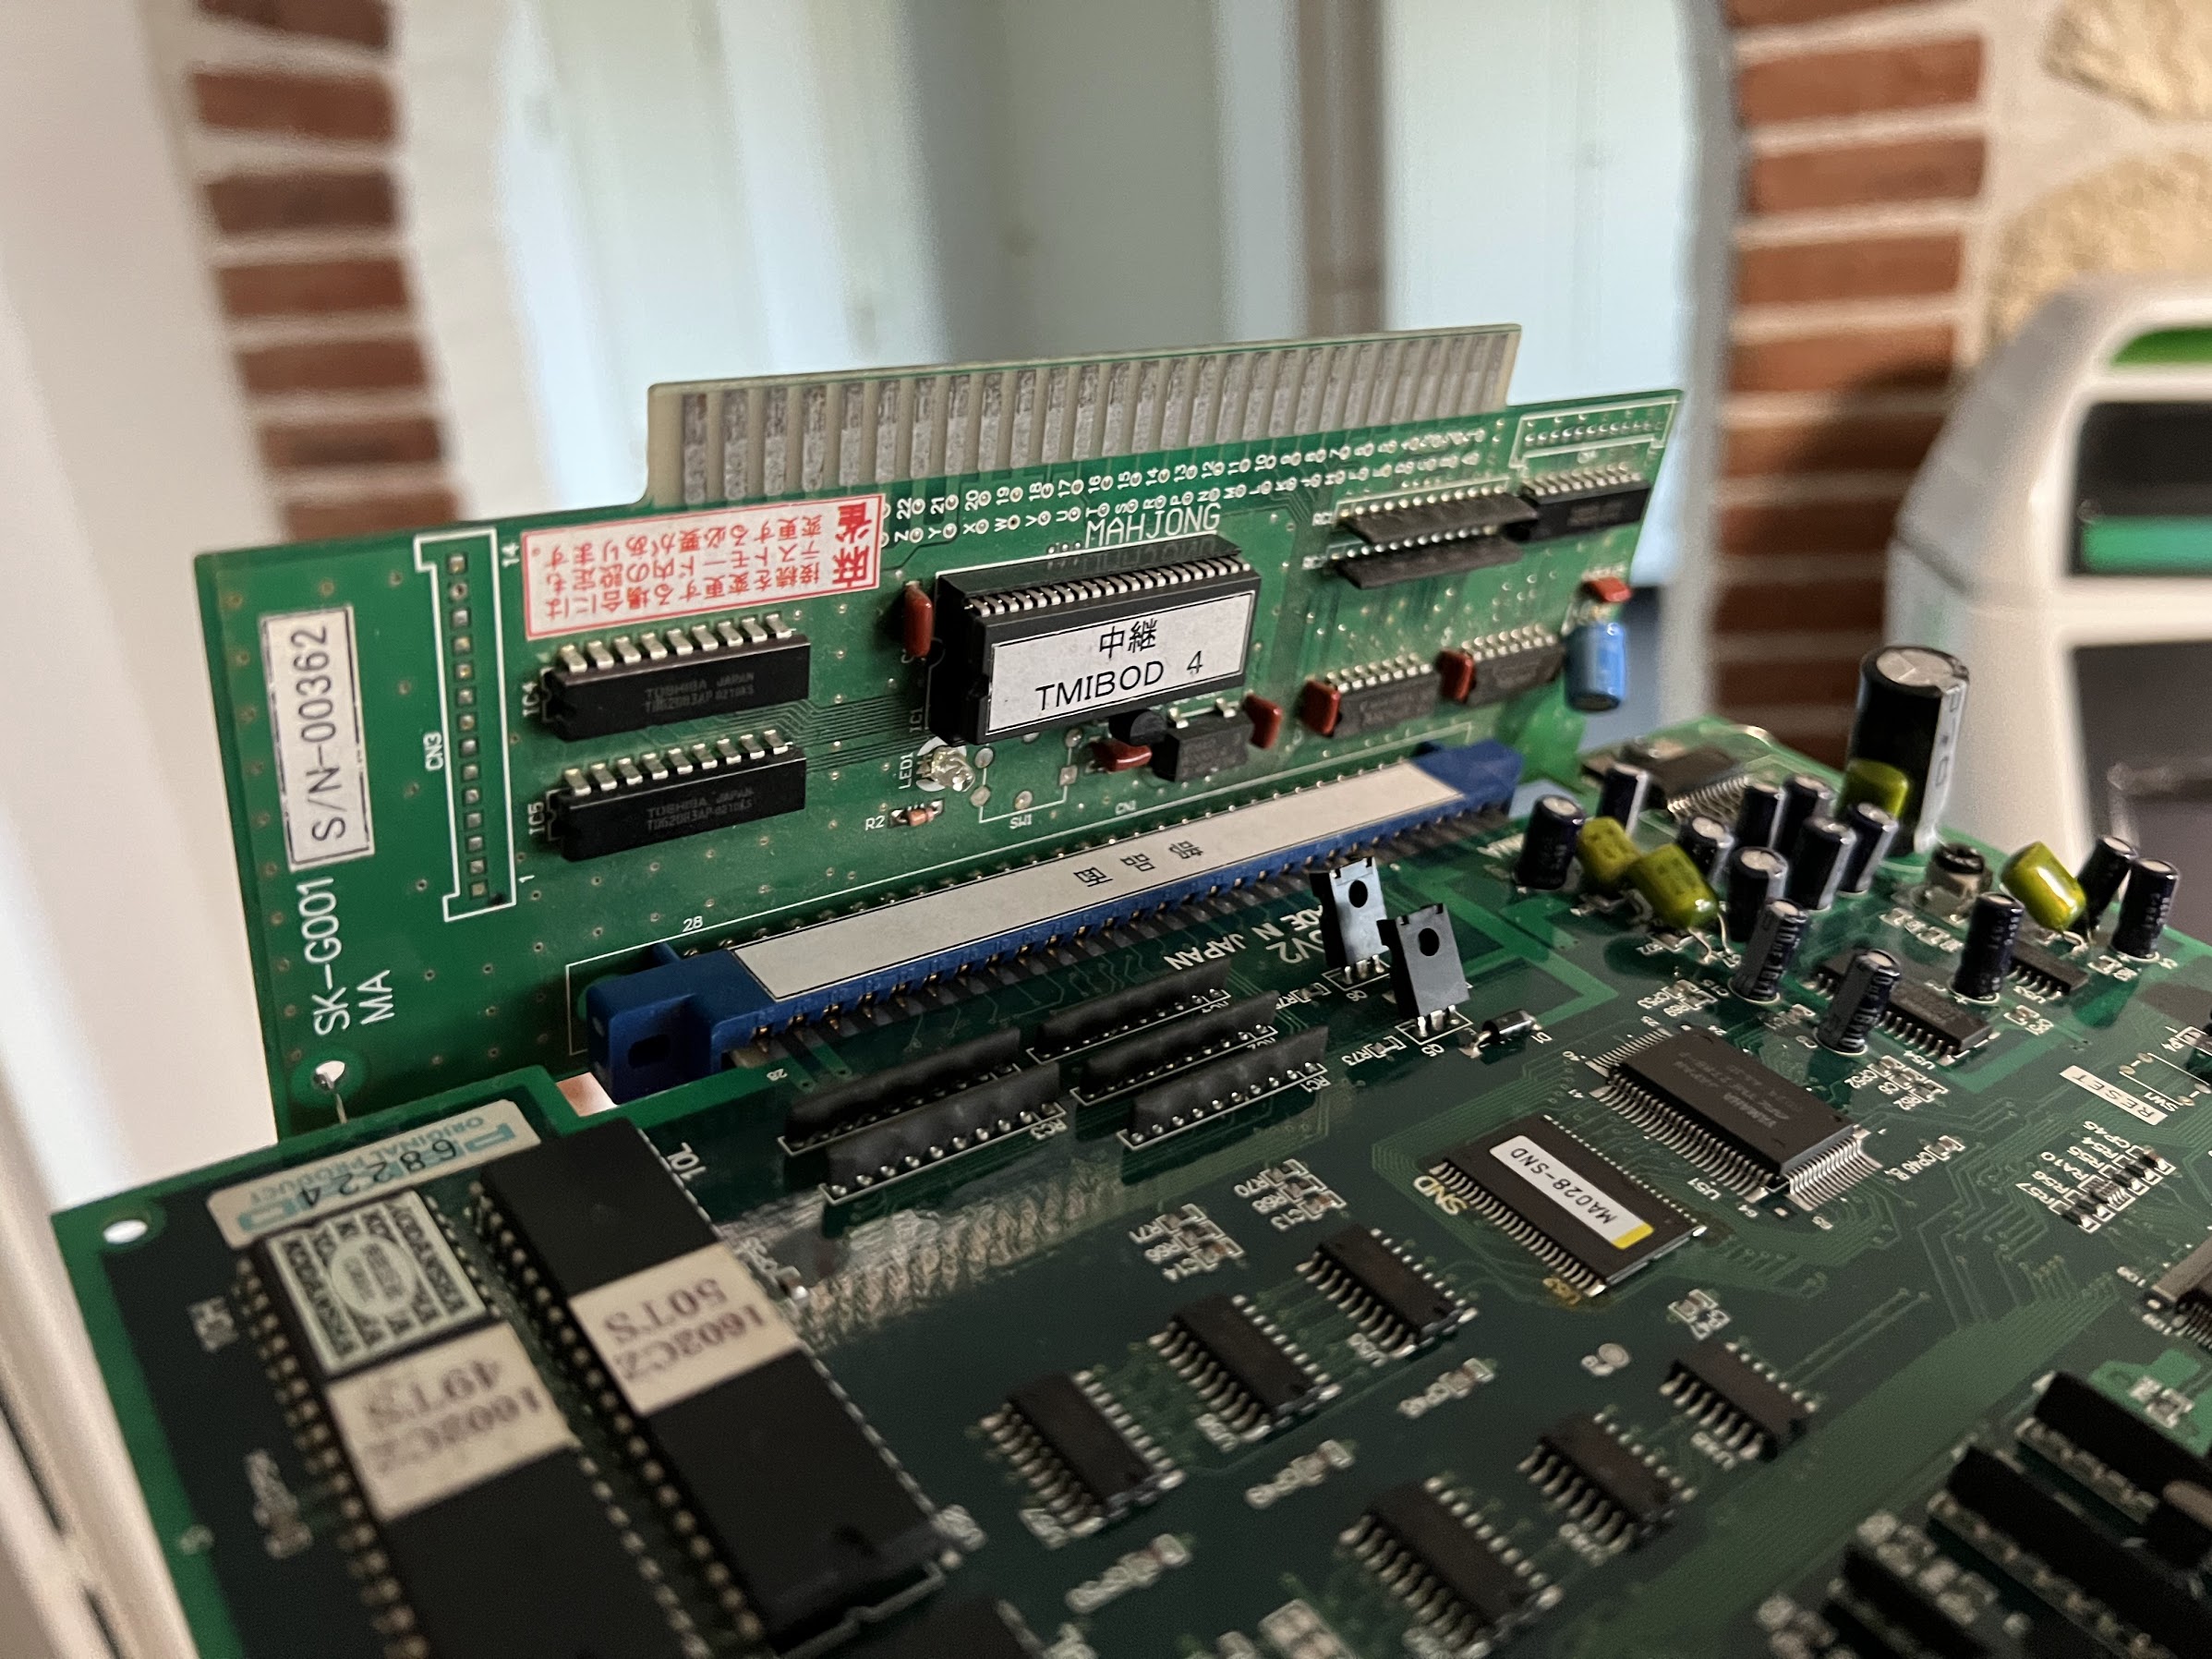
And here is a Mahjong game and a Jaleco Mega System 32 circuit board, which together make a game playable in a cabinet.
How were these games typically played?
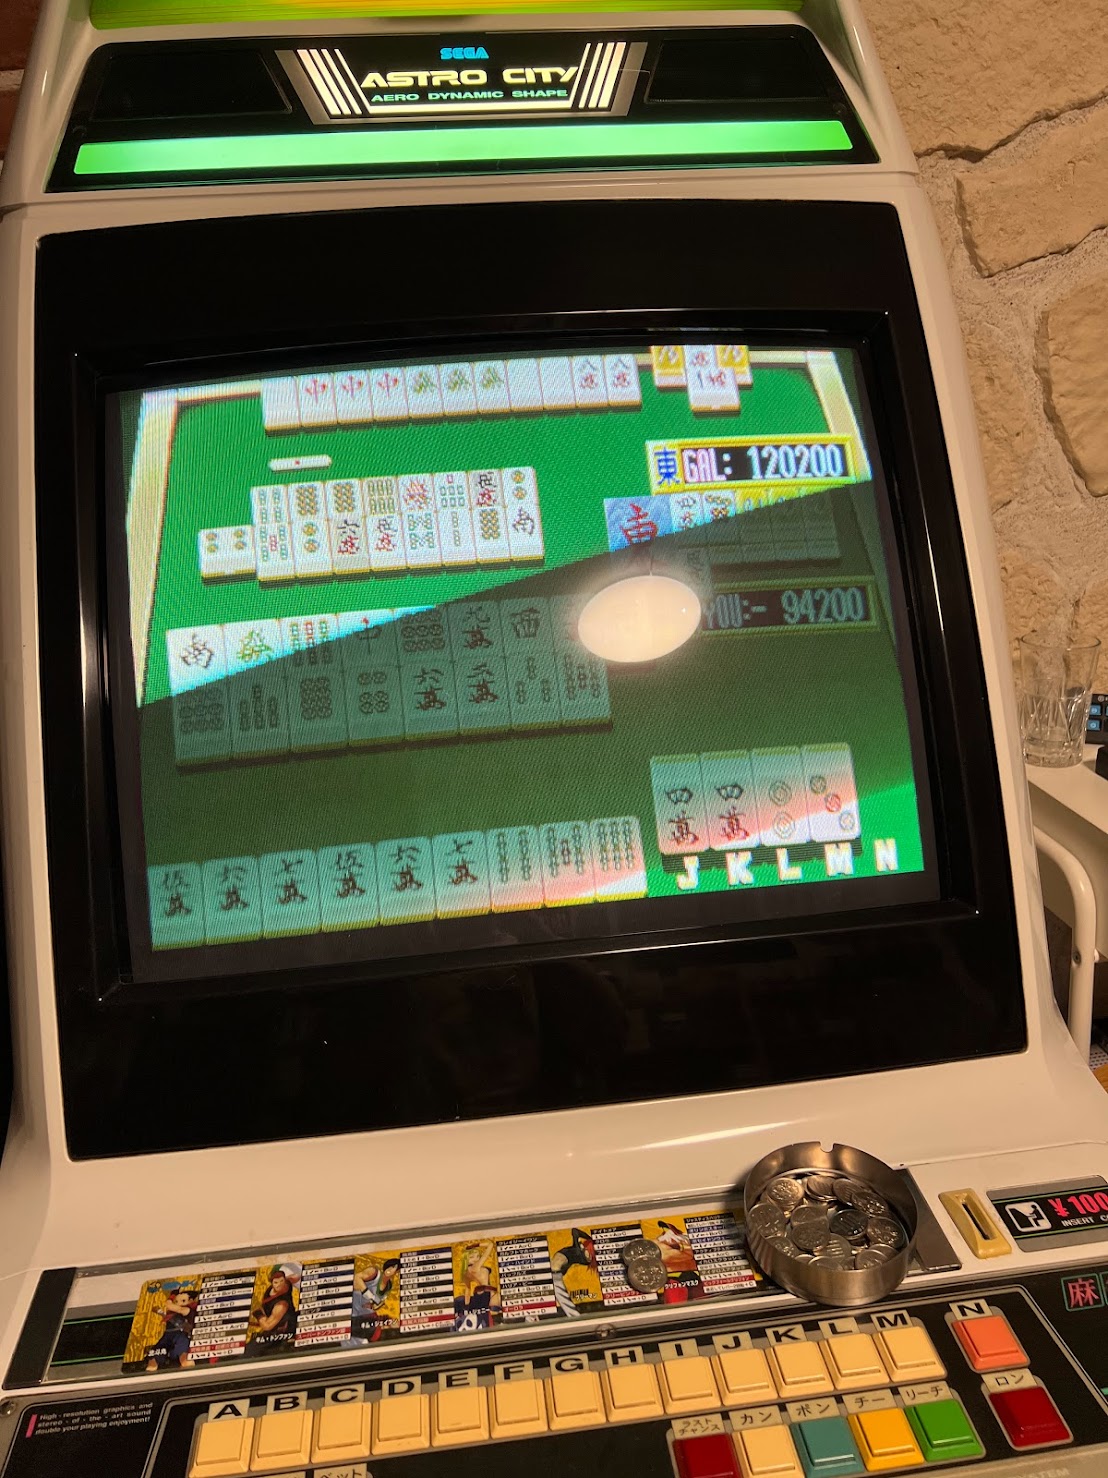
Mahjong arcade games are historically played on a regular arcade cabinet with a custom panel.
Some games allow controlling them with regular arcade stick + buttons. In that case, any typical cab can be used.
For home use, there has been some supergun designs which allow for playing Mahjong games (such as the Pana Twin MP-92), but this is uncommon.
Nudity and Arcade Mahjong
In arcade mahjong, many games are "strip mahjong" games which contain some amounts of nudity. Winning games against AI opponents in these games will cause the opponent to discard clothing and showing topless graphics. Some games will allow enabling/disabling this through hardware or software dip-switches.
Adapters
Unfortunately, hooking up a typical Mahjong game to a Jamma cabinet or a supergun is not just plug & play, and some additional hardware will be needed (unless your cabinet is already wired for Mahjong instead of Jamma). This is due to almost all pins on a Mahjong connector behaving differently, or being in another place than on Jamma.
An adapter is responsible for converting the games Mahjong card edge to a Jamma compatible edge for use with a Cabinet or Supergun. It will also need external wiring for hooking up a Mahjong panel.
The most typical adapter like this will have an edge connector for Mahjong at one edge, and then a fingerboard for Jamma on the other side. There will also be some sort of connector for hooking up directly to the Mahjong panel.
Example connector from hkmtnx on YAJ:
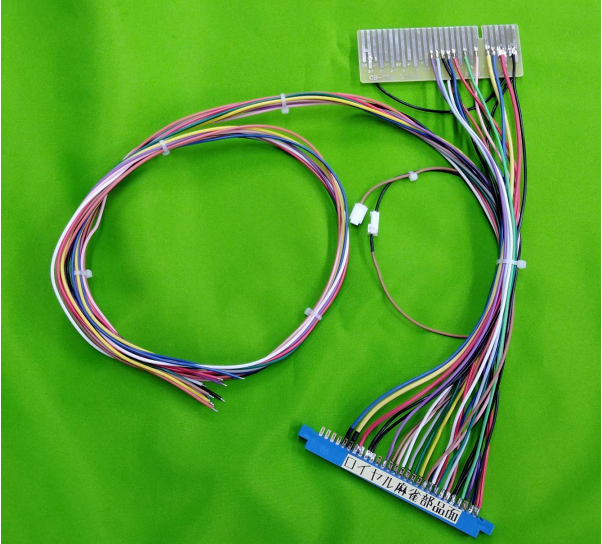
Building these can be done with a fingerboard, a Jamma edge connector and a bunch of wires. Just follow the pinout below. Alternatively, you can search for "麻雀ハーネス" (Mahjong Harness) on Yahoo Auctions JP, and you should find some. A good seller is hkmtnx.
Another option is a smaller straight adapter without wires, with hookups for a panel like this one that I designed.
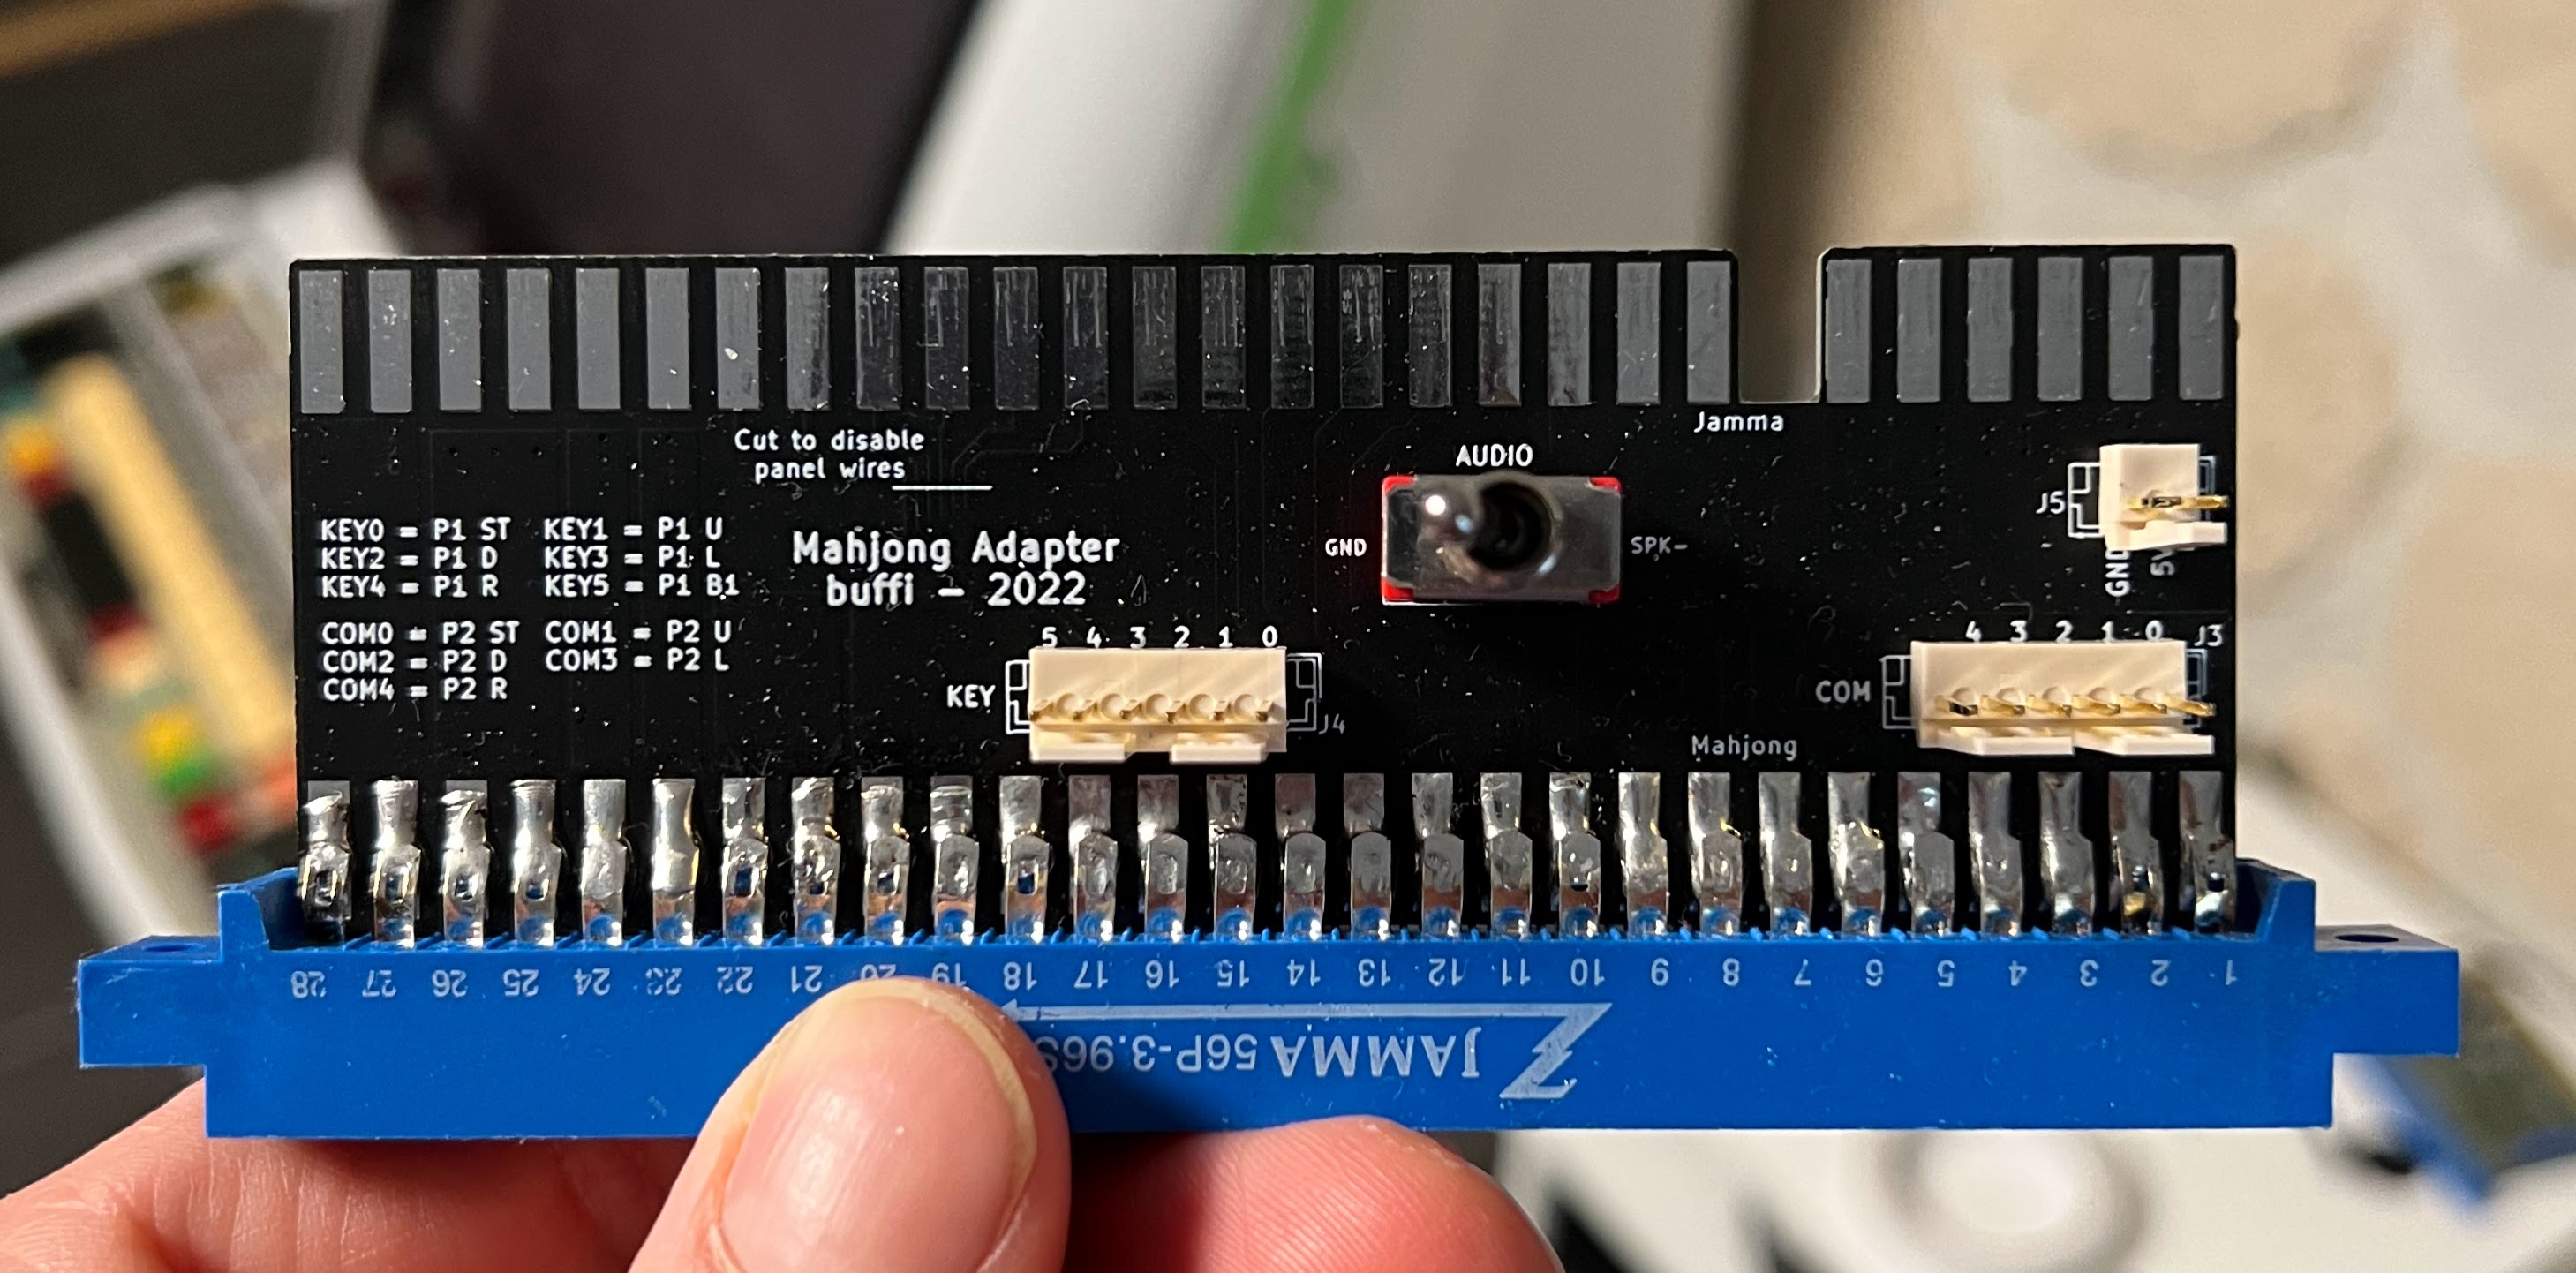
Both of these have benefits/drawbacks. The biggest issue with the adapter without wires is that some Mahjong games will have an angled connector prior to the adapter, which will make things awkward to mount in a cabinet, and cause extra strain on the card edge.
Mahjong pinout
Mahjong games will typically have one out of two possible pinouts, with some minor variations between hardware.
For older games, you may have a 20 pin connector, and a 36 pin connector looking like this:
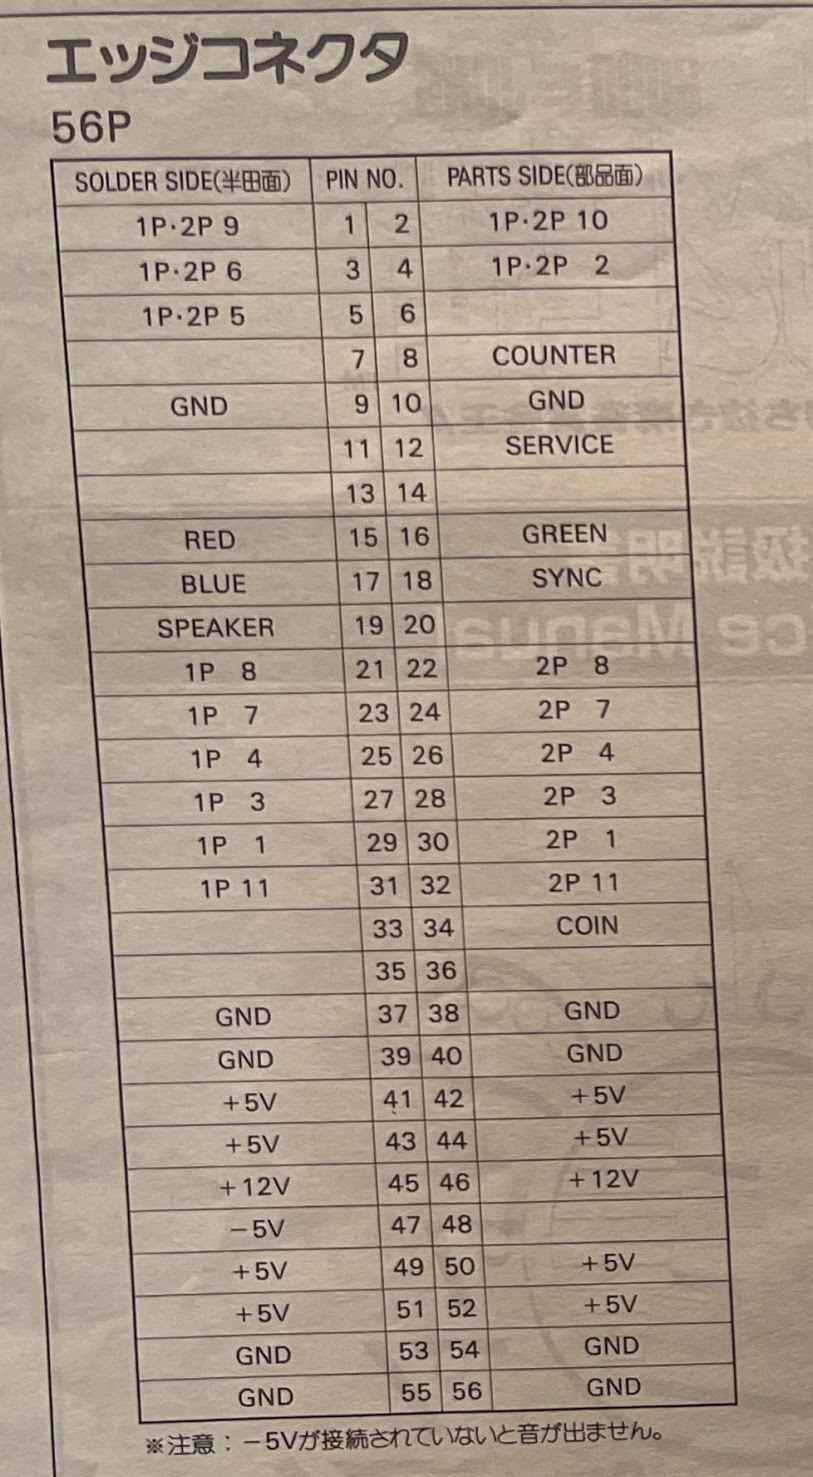
Otherwise there will be a 56 pin connector looking like this:
The 56 pin connector is mostly a merged variation of the older pinouts, and it is NOT COMPATIBLE WITH JAMMA without an adapter, despite having the same size.
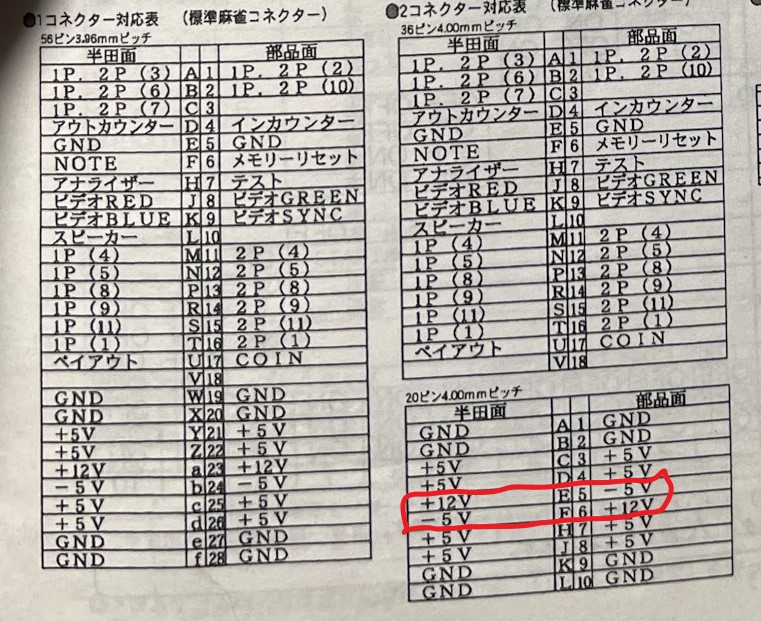
The common pinout for the 56 pin connector will be something like this, with some variations (please read the sections below carefully):
Voltages
The typical voltages required for Mahjong games are just +5V and +12V but some games require -5V as well. Power supply is handled through pins 19-28 and W-f, as visible in the pinout table above.
On older games with a separate 20 pin connector, the 12V and -5V may be crossed over like this, so some care must be taken:
Audio and Video
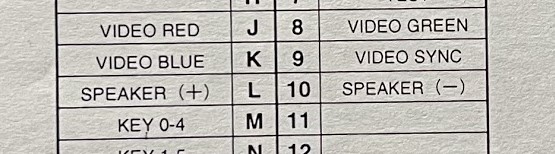
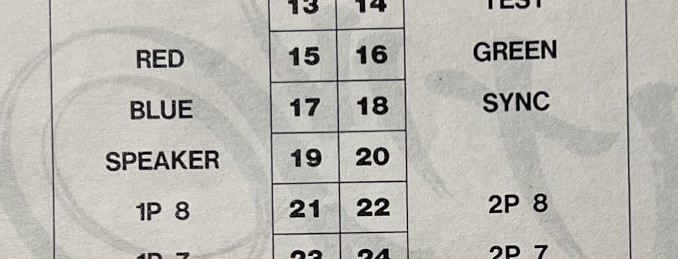
Audio will be amplified and compatible with Jamma, but there are some variations for the negative pinouts. Most games will have audio use a positive output (SPK+ at pin L) and then common ground for negative audio (GND acting as SPK-). Other games requires using the pin of the opposite side of the SPK+ pin as SPK- (pin 10). Using GND as the negative audio for these may cause damage to the game PCB.
To figure out which type your PCB is, you can either simply try to use SPK- as pin 10 first. Otherwise check these things:
- Do you have the instruction sheets? That will specify if pin 10 is connected separately from GND.
- Is pin 10 unconnected on the PCB? In that case it uses GND as negative.
- Check connections between pin 10 and GND to see if they are tied together. In that case, it uses GND as negative.
| Game with pin 10 as SPK- | Game with GND as SPK- |
|---|---|
 |
 |
Video signals are compatible with Jamma without any conversion. Note that Mahjong pinout do not have a separate Video GND, so the Video GND of the Jamma harness should be tied to common GND.
Controls
Since Mahjong games require up to 27 buttons per player (and some games support two players), buttons are connected as a matrix instead of the way Jamma buttons are configured. This means that the Jamma pinout is NOT compatible with Mahjong panels directly, and you will need to use an adapter.
One side of the control connection matrix has 5 "COM" ports located at pins 1, 2, A, B and C. The "KEY" ports for these for Player 1 will be pins M-T. For two player games, pins 11-16 will be "KEY" ports for the second panel (these are not connected to anything for one-player games).
This is better illustrated by the image and table below, which shows how buttons are connected.
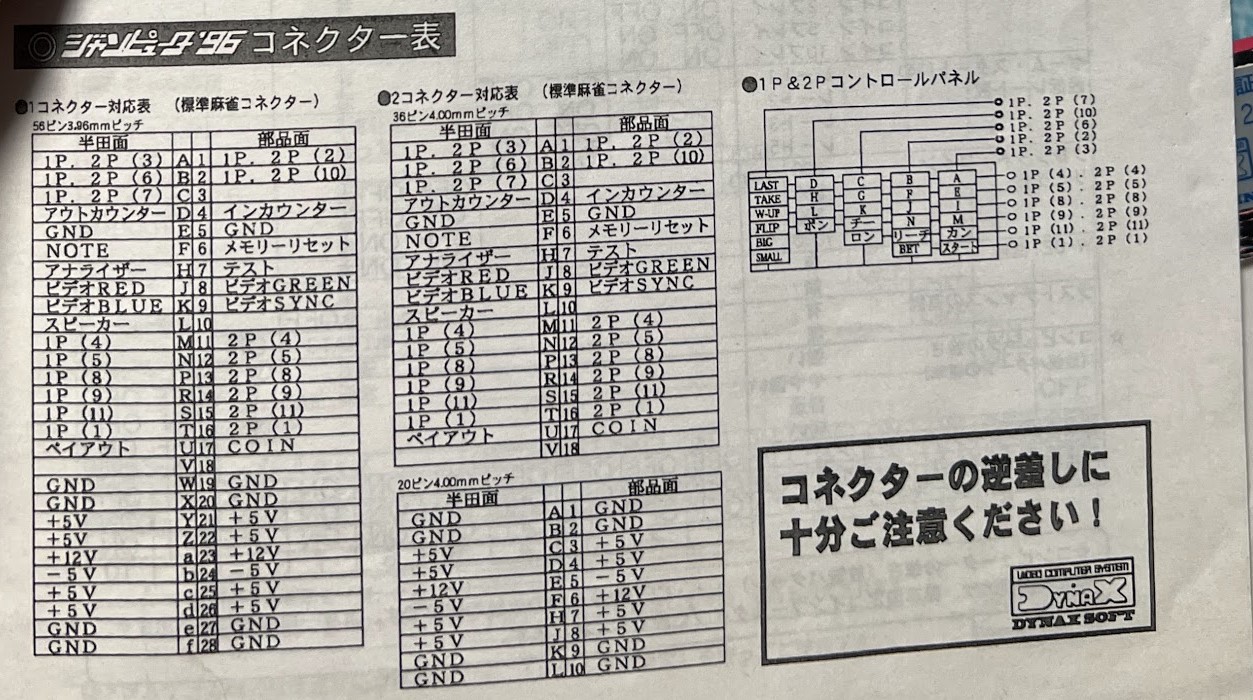
Which translated into a table becomes:
| PINS | M | N | P | R | S | T |
|---|---|---|---|---|---|---|
| A | A | E | I | M | KAN | START |
| 1 | B | F | J | N | REACH | BET |
| B | C | G | K | CHI | RON | |
| 2 | D | H | L | PON | ||
| C | LAST | TAKE | WUP | F.F. | BIG | SMALL |
Control panels will have a connector with 11 pins on it. These should be connected to the adapter that's connected to the circuit board. See more information about adapters in sections below.
Coin entry, Test and Service switch are regular switches that will activate when connected to GND.
Jamma compatible Mahjong games
Some games can be played with typical Jamma setups, instead of Mahjong pinouts. These will instead use stick + buttons for controls. These games can be identified by having the "key" cutout at pin 7, which Jamma games should have. For these, no adapters are needed unless you want to use a Mahjong panel. Some games or systems come with game-specific adapters to translate these Jamma pins into Mahjong pinout, to connect a panel. See examples below:
| G-Taste PCB (Jamma) | G-Taste adapter | Connected |
|---|---|---|
 |
 |
 |
This is also common for multi-game systems where only some games are Mahjong (like ST-V, Kaneko Nova...).
Mahjong in mame
If you just want to play the games, and not deal with the hardware, most games will run great in Mame on a modern PC. This is out of scope for this page, but there's a great page for this at Mahjong in Mame.
Thanks to
- AeroCityMajor : For pinout information on PsikyoBabble, maintaining MahjongInMame and selling me a lot of PCBs.
- system11 : For pointers on pinouts, and other help.
- Neo Geo Dev Wiki : For NeoGeo pinout information
- ぽ・ん・こ・つ・舎 : Japanese blog about arcade repair and mahjong. Used as source for some game system pinouts.
- gravatos : For scans and pictures of Aleck 64 Mahjong info